Behind the Green: The Unglamorous Truth About Keeping Your Living Wall (and Your Walls) Dry
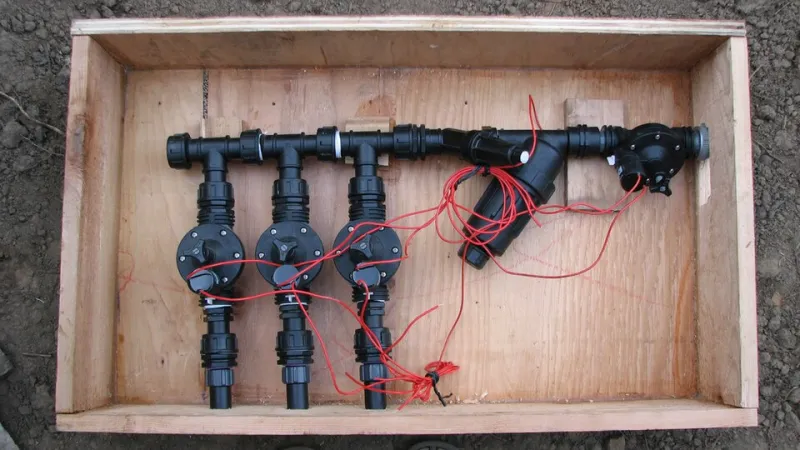
Photo: michael, CC BY 2.0, via Wikimedia Commons
Let's be honest: nobody buys a living wall because they're excited about drip emitters and drainage trays. You bought it — or you're dreaming about buying it — because a wall of trailing pothos and lush philodendron makes your Albany row house feel like something out of a design magazine.
But here's the deal. Water is the engine of a living wall, and water is also the number one threat to the thing your plants are mounted on. Get the moisture management wrong, and that gorgeous green feature quietly becomes a $4,000 drywall repair. Get it right, and your wall hums along for years with maybe fifteen minutes of attention a week.
This is the article we wish every homeowner read before their install. No glamour, just the stuff that actually matters.
Drip Systems vs. Hand Watering: Pick Your Fighter
There are two ways to keep a living wall watered, and the right choice depends mostly on the size of your wall and your tolerance for routine.
Drip irrigation is the set-it-and-mostly-forget-it option. A network of slim tubing runs behind the planting pockets, delivering water directly to each plant's root zone on a timer. For anything larger than about four feet wide, we consider this the only realistic option. Hand-watering a big wall means standing there with a watering can for twenty minutes, and the plants at the bottom always get soaked while the top row stays thirsty.
The upside of drip is consistency — plants love a schedule. The downside is that when something goes wrong (a clogged emitter, a failed timer, a fitting that works loose), it goes wrong while you're not looking. Which brings us to the hand-watering camp.
Hand watering makes sense for small walls, rental-friendly portable panels, and anyone who's home often enough to build it into their week. The genuine advantage is that you're face-to-face with your plants every time. You notice the yellowing leaf. You catch the dry pocket before it crisps. You're the leak detection system.
A middle path worth considering: install drip, but walk the wall with a watering can once a week anyway — not to water, but to inspect. It's the best of both worlds.
Drainage: The Part Everyone Skips and Everyone Regrets
Here's a hard truth: every living wall produces runoff. Even the most efficient drip system flushes excess water through the bottom of the system, and that water has to go somewhere.
If your installer doesn't talk about drainage, find another installer. The options, roughly in order of preference:
- A concealed gutter or channel integrated into the bottom of the system, piped to a drain or a small condensate pump. This is the gold standard for permanent installs.
- A drainage tray sitting on the floor or mounted at the base, emptied on a schedule. Fine for medium walls, but it needs to actually be sized for a full flush, not a light dribble.
- A recirculating system that catches runoff in a reservoir and pumps it back through. Efficient, but it needs regular cleaning or you're misting your plants with stale, nutrient-depleted water.
What you should never accept is water freely running down the interior wall behind the panels. That's not a system — that's a countdown.
The Vapor Barrier: Your Drywall's Bodyguard
Even a perfectly drained wall gives off humidity. Foliage transpires around the clock, and over months, that moisture migrates into anything porous behind it. Standard drywall is basically a sponge with a paint job.
The fix is a vapor barrier — typically a waterproof membrane or a PVC-style backer panel — installed between the planting system and the wall itself. On new installs, this is non-negotiable in our book. If you're retrofitting, it may mean pulling a section of drywall and starting fresh, which sounds dramatic but is far cheaper than mold remediation.
While we're at it: if your wall is on an exterior-facing wall or shares space with a bathroom, get the moisture picture checked twice. Albany's older housing stock — all those beautiful Center Square and Pine Hills homes — can hide surprise issues behind plaster and lath.
Warning Signs Your Wall Is quietly Wrecking Your Wall
Hidden water damage doesn't announce itself. It whispers. Here's what to watch (and smell) for:
- A musty smell near the wall, especially in still air. If your living room suddenly smells like a basement, act.
- Paint that bubbles or peels at the edges of the installation, even a foot or two away from the wall itself.
- Baseboards or trim that swell, stain, or separate from the wall.
- Dark staining on drywall below or beside the planting system.
- Plants that suddenly look great while the wall behind them looks worse. Leaking water sometimes pools where roots can drink it up — a lush bottom row paired with suspicious staining is a red flag combo.
Do a monthly walk-around. Run a hand along the wall surrounding the installation. It takes two minutes.
Albany's Weird Wrinkle: Dry Winters, Wet Walls
Here's something that surprises a lot of local homeowners: our heating season is hard on living walls — but not in the way you'd expect.
From November through March, forced-air furnaces and baseboard heat drop indoor humidity to desert levels. Your plants will drink more slowly, but they'll also lose moisture through their leaves faster, and the air wicks water out of your planting medium quicker than you'd think. Meanwhile, that same dry air makes you less likely to notice a slow leak, because everything feels parched.
Our advice: shift your irrigation timer seasonally (shorter, less frequent cycles in winter), consider a small humidifier nearby to take the edge off, and never let the winter routine — including your monthly inspection — lapse just because the plants are in slow-growth mode.
A Word on Insurance and Paperwork
Two unglamorous but important notes:
First, take photos of the installation during the build — especially the vapor barrier and drainage work before anything gets covered up. If you ever file a claim related to water damage, documentation of proper installation is worth its weight in gold.
Second, call your insurance agent and ask whether a permanent irrigation system connected to your plumbing affects your policy. Most of the time it's a non-issue, but if your system ties into a supply line, you want that conversation before the connection, not after.
The Maintenance Schedule We Actually Recommend
Keep it simple:
- Weekly: visual check of plants, quick look at the drainage output, wipe any hard-water spots from leaves near emitters.
- Monthly: hand-along-the-wall inspection, flush check, timer battery check.
- Seasonally: adjust irrigation timing, deep-clean the drainage tray or reservoir, prune and rotate plants as needed.
- Annually: a full system check — tubing, fittings, pump (if you have one), and a look behind the panels at the barrier itself.
None of this is hard. It's just deliberate. And honestly, that's the whole secret to a living wall that lasts: the beauty is in the leaves, but the longevity is in the plumbing. Treat the boring half of the system with respect, and the showy half will reward you for years.